
Spotlight on: Land
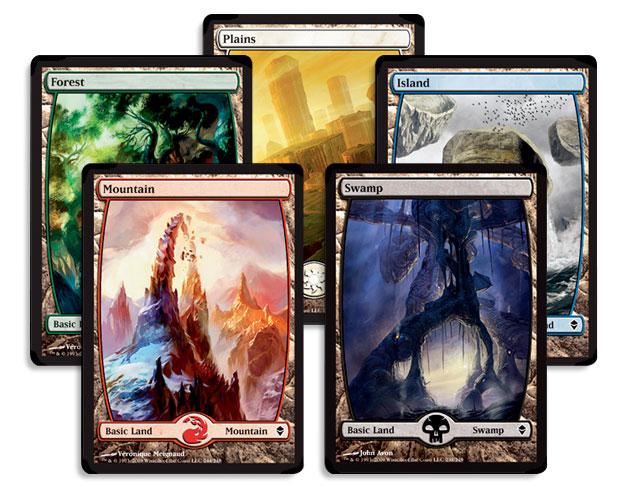
Today’s spotlight is going to be a little bit different, as someone trying to be very clever suggested I do one of these on basic lands. While this seems a stupid suggestion on the face of it, it got me thinking: this could actually be a very good idea and may prove to be more effective in helping newer players or tweaking experienced players than even any other future spotlights might be. This is because your mana base is actually the most important aspect of any deck you build, ever, but tends to be the area that is given the least thought. To the point where I myself have been caught out playing a black-heavy Orzhov (black/white) deck without any swamps in it at all! (I hear Mike’s voice say “noob”). So let’s take an in-depth look at a concept that, on the face of it, seems common sense but can actually be more important than even the cards you draft.
Mana is central to both gameplay and deck building, so understanding it is the crucial first step toward mastering Magic. Two of the most important concepts, when it comes to deck building, are mana base and mana curve. Let’s expand on these a bit so we know what we are talking about.
Your mana base is the mana that your deck is capable of producing, as an entire pool. Your mana base can be simple, say with 16 swamps and nothing more, to more complex, featuring multi-coloured lands of different types, mana producing artifacts and creatures or cards that change the type of mana your lands can produce.
Your mana base determines not just which spells you can play in your deck, but much more importantly, which spells you can reliably play in your deck. This is a crucial concept to understand if you are to be a consistent player, especially in a draft
format like Cube. To illustrate this point, let’s look at three cards from our Cube: Boros Reckoner, Hornet Queen and Charmbreaker Devils.
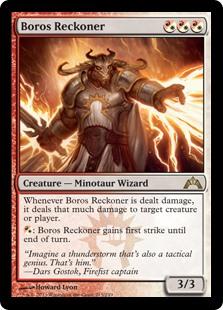
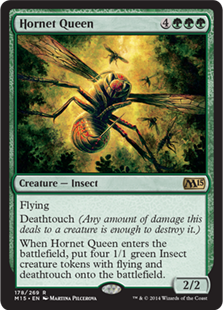

These are all excellent cards in their own right, as I am sure you will agree (if you don’t, speak up! One could be the next spotlight). An excellent creature, or indeed any permanent, is most excellent when it lands on curve. Casting a spell on curve is casting the spell on the same turn as its converted mana cost. So, when a 2/1 hits the table on turn 1, it is a monster. When it hits the table on turn 8, it is likely a chump blocker at best. This is where your mana base is absolutely vital, and why such a crucial aspect to your play simply cannot be overlooked.
Looking again at our cards above, in order to play Boros Reckoner on curve on turn three, you almost have to be playing Red/White, or mono of either colour. Although you can play its 3 mana cost with either Red mana or white mana, if you try and main deck this guy into a Red/Green deck, for example, he is almost never going to land on curve. You need your first three land plays of the game to be R, R, R. While this is possible, it is not practical and even if you could, you are likely kicking yourself in the balls by neglecting your other colour for such a long and important period of the game, or playing too many tap lands to get it over the line and having no other early game.
The same applies to Hornet Queen. If you are picking this guy, you must say to yourself, I am committing to Green. If you are drafting Black/Blue and you crack this guy and think “I am going to play three colours for this”, you are going to struggle. Disagree and try it, by all means, but you will find it extremely unreliable to hit the three green you need to play him. Needing three mana of a particular type on the board is simply not viable for more than two colours. For contrast, let’s take a look at Charmbreaker Devils.
This guy costs 6 mana on the face of it, and Boros Reckoner costs 3. If you are playing Red/Blue and have both of these cards in your deck, you might as well consider them to have a similar mana cost in terms of curve. To have three Red mana on the table, the odds are you have almost 6 mana in play. This is vital to keep in mind when drafting. Charmbreaker Devils is what I call splashable. You can very comfortably splash into a third colour to play this card, as all you need is one single red mana on the table and you are almost there. You have unlocked the door to playing this card, and are just waiting on any old land to build up to whatever remains of the 6.
And so, talking about basic lands has us directly talking about draft strategy. Hornet Queen as a first pick is much, much less versatile than Charmbreaker Devils as a first pick. This gives a little insight into how to think in greater depth about drafting, particularly through the first pack. It can be greatly beneficial to stick to particular colours early on, but also to stick to cards that do not focus on a specific mana type as hard as, say, Hornet Queen does unless you are completely committed to playing that colour. Even if you do fully commit yourself, such a strategy can leave you vulnerable if there are not enough strong cards of this colour being passed to you, especially if other players are drafting it as hard as you are. Instead, a different approach can be to try to stick to cards that are lighter on the mana symbols. What this means for later packs is that if you then crack open a fresh one and see something that you simply cannot pass up, you can take it and go into perhaps a three colour build much more seamlessly than if you are picking cards with heavy single mana symbols.

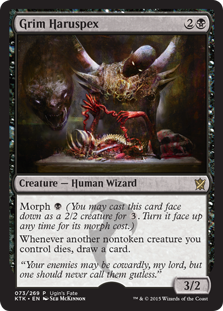
To illustrate I have listed two cards above. Drafting Despoiler of Souls in this case is committing yourself more towards black as you will need heavy black in your deck to have any chance of dropping him on curve. Picking Grim Haruspex is staying more open, despite it having a higher converted mana cost as it is more splashable. I hope this is making sense, because it is important.
So how much mana should I put in my deck?
Now, there are no real hard and fast rules about what a mana base should look like. Existing theories, or even your own practises, may need to be tweaked or thrown out depending on the situation. But what I can do is give you a very good guideline that will work for you in 99% of situations and builds.
Traditional knowledge is that lands should make up around about 40% of a deck. This means about 15-16 lands for a 40-card deck, 23-24 lands for a 60-card and 38-39 lands for your commander. This is a tried-and-true structure that’s worked for many players for many years. You’ll rarely be making a big mistake if you always stick to such a guideline. But, as I mentioned above, there are a number of factors that might make you consider small adjustments.
Your curve is one serious consideration here, as if you are playing a slow, heavy build you may want to tweak a card or two towards heavier land, as you will need high percentage land draws to cast your spells. If you are building for a speedy, rush type strategy, the opposite is true. You want to be slightly leaner on your mana base, to give a higher percentage towards drawing cards that pressure your opponent, and should be able to cast almost everything in your deck with 4 mana sources on the board.
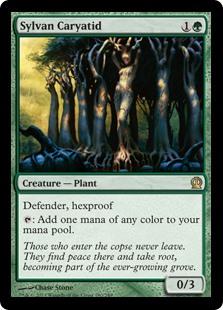
Also, you may have cards like Birds of Paradise, Sylvan Caryatid or Sol Ring in your deck that perform the functions of a mana source. This allows you to take a risk and run slightly leaner on lands again, giving higher percentage chances to more meaningful draws during play.


Mulligans
Knowing what mana type your deck needs most to function can be the difference between consistent play, and talking to me after the tournament saying “I just don’t know where it all went wrong”. This is where the decision to mulligan can actually
be the difference between winning matches and being caught out without being able to cast your spells. But it comes at a risk.
Our Cube night rules are such that you are allowed a free Mulligan, which I believe adds a layer of fairness to each match, particularly since our matches are often a best-of-1-game scenario. But you need to be careful. For me the policy I always stick to is knowing what I need as a minimum and keeping the first hand that ticks these boxes, forgetting all else. The risk of being too fussy is you can start to drop cards from your opening hand, and this puts you immediately behind on resources.
I will take my most recent Cube deck (Cube 6) as the example to use to illustrate these ideas. Looking at my build, I know that the deck performs at its peak when it can drop out early black threats. When Desecration Demon, for example, lands on curve he is an absolute beast. For this reason, I know before I pick up my starting hand of 7 cards, I need to have a black resource of some kind. Be it a swamp, or a forest and Birds of Paradise. If I do not have black in my opening hand, let’s examine the odds to see when my first and second swamps are likely to show up:
Turn 1: 8/33 24%
Turn 2: 8/32 25%
Turn 3: 8/31 25% Got one.
Turn 4: 7/30 23%
Turn 5: 7/29 24%
Turn 6: 7/28 25% Got my second.
This is only what is likely to happen. It is likely that I will pick up my second swamp by turn 6, meaning Desecration Demon is likely to be two turns late. But we can see from the table above that I am likely to draw a singular swamp in 3 turns, and almost guaranteed by 4 turns. This means that if I have a swamp (or any black mana producer) in my hand at the start of the game then the odds are massively in my favour that I will be able to drop my Desecration Demon on curve should I see him. He is such a huge turn 4 play that this is what I look for as my base strategy.
This does not mean I will keep any hand with a swamp in it. Looking at the rest of my deck, I have some decent mana fixing available, but only if I can get a single forest onto the table. Having a forest even gives me the potential of fixing any issues where I am lacking swamps, so it is important that I get at least one green mana available in my starting hand too. So for this particular deck, I will absolutely keep any hand that has a black mana generator of any kind (i.e., Birds of Paradise) and a green mana land, regardless of what spells I am seeing because I know with the cards in my deck, this will have all of my bases covered for the match, according to what is likely.
But by the same token, I will almost never keep a hand that has more than 4 land in it either. On the face of it, this looks like it will cover your mana base for the game, and the odds of you drawing even more land must be pretty slim, as you have so much of it in your hand already, right? So let’s give it a crack. Let’s actually break it down looking at a starting hand of 5 land and 2 spells:
Chance of drawing a 6th land.
Turn 1: 10/33 30%
Turn 2: 10/32 31%
Wow. On turn 2 we have 6 mana and 3 spells. Let’s keep going.
Turn 3: 9/31 29%
Turn 4: 9/30 30%
Turn 4 and we likely have 7 mana and 4 spells. This is already all of the mana we are ever going to need for the whole game, and the odds of drawing more is still huge. This basically puts you behind on resources from the start, and it only gets worse from here. You simply will not have enough resources to cope with an opponent who has a more stable draw.
If you are too fussy with your initial draws, and are taking mulligans when you don’t see particular cards or combos, you are going to run into trouble with the huge risk of dropping cards from your starting hand. The best advice I can give here is: don’t do this. But it’s your choice whether you choose to listen!
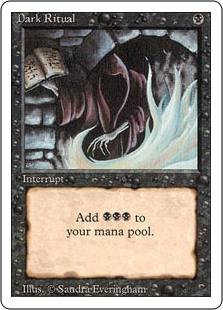
Ramp
Let’s have a look at another important deck building strategy and concept: mana ramping. As much as it is a strong and viable strategy to go lean and focus on cheap, efficient spells and creatures in order to rush kill your opponent it is also viable to focus on the long game, and fill your deck with all of the biggest, baddest and most powerful creatures you can get your hands on. For this strategy to work, you need to support all your high mana costs with cards that allow you to get mana sources out on the board at a much faster rate than your opponent. This allows you to play your spells ahead of curve, a concept that we call “ramping up your mana”, or simply, “ramp”.
I have already talked about Sol Ring in previous discussions, and there is an image of it above if you need a refresher. A card that reads so simply and innocuously to the uninitiated, but is actually one of the most powerful cards in the Cube and is an absolutely justifiable Pack-One Pick-One. Tap to add two colourless mana to your mana pool, this is the epitome of a ramp card. It is the card that young ramp cards aspire to be when they grow up. So why is it so good? It provides mana but it is not a land itself; it only costs one mana so it can be reliably dropped on turn one; it ramps you a whole two turns ahead of your opponent for the rest of the game. Holy testicle Tuesday. Consider the following sequence of events, where you have snatched up Sol Ring the second you saw it in your packs like a clever little drafter:
You win the dice roll and decide to play first.
Turn 1: Play swamp, tap it, play Sol Ring.
Opponent: Play forest.
Turn 2: Untap swamp, play mountain. Tap swamp, mountain and Sol Ring. Play this, unleash it and attack for 4.
Opponent: Wipe away a tear. Play swamp.
At this point, your opponent is screwed and will likely be forced to desperately drop blockers to stop the onslaught, forcing card advantage, or he will just scoop if he has no removal in hand. Especially since Sol Ring stays in play, making you two turns in front forever. If he doesn’t scoop, let’s continue:
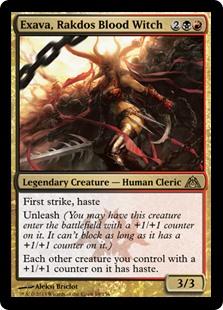
Turn 3: Untap everything. Play mountain. Attack with Exava. Tap swamp, two mountains and sol ring. Play this for Bloodrush cost and swing in for 14:
14 damage, on turn three. Your opponent has only had a chance to drop two land and is already on 2 health. The havoc you can cause with ramp cards like Sol Ring is absolutely brutal.
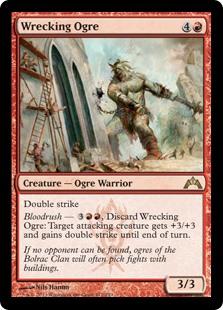
Here are some other ramp staples that accelerate the speed at which you can play your expensive spells:
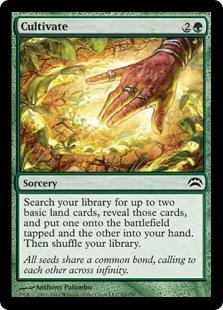
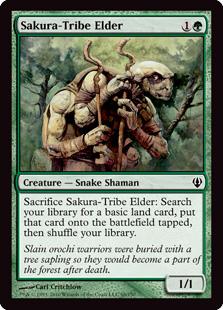
All are excellent picks, that should absolutely be in your deck if you draft them. If you sideboard one of these while you are playing these colours, you are doing it wrong. Fact.
Enters the Battlefield Tapped
This is a phrase you ought to become very familiar with for the purposes of building mana bases. It’s a very common drawback on lands that produce multiple colours of mana and brings us to yet another important Magic concept: tempo.
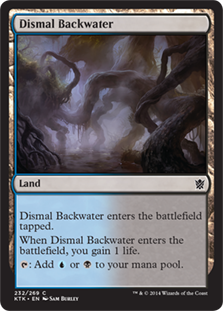
Without a doubt, entering the battlefield tapped is a drawback. Just how much of a drawback it is depends on the circumstances. To illustrate this point, think about the different ways it might impact gameplay. If you have a Dismal Backwater in your opening hand and have no spell to cast on turn one, then it will not negatively impact you at all to play this land on turn one. On the other hand, you may be facing down a lethal attack next turn and have a board wipe in hand but are one mana short. You draw a land off the top! But it comes into play tapped and it just completely cost you the match.
The tempo cost of these cards should be kept in mind when putting together your deck, as they can make a critical difference to your plans. If you are playing for speed, and are planning a rush build, it would probably almost be best to include 0 of these. They slow you down that much, that it is not worth the mana fixing they provide.
In general, the costs of entering the battlefield tapped go up as the format you are playing becomes faster or more powerful. The costs go up as your deck becomes faster, and as you add more enters-the-battlefield-tapped lands to your deck. In other words, in a slow build-up deck with lots of high casting cost late-game cards, tap lands do not have as much impact as if you are trying to be aggressive from turn 1. If you are playing too many tap lands you simply will not be able to be aggressive in the early game at all.
Pain and Shock Lands
In much the same way as entering tapped is an issue, paying life for a land is a clear drawback too. Exactly how much it impacts your chances to win a game is up for debate, and depends entirely on the build and situation, just as with lands that enter tapped.
Aggressive decks tend to have no problem paying life in exchange for mana consistency. This is especially important since enters-the-battlefield-tapped lands can be so disruptive to tempo strategies. An aggressive deck will, in most cases, pay the 2 health for Blood Crypt to enter untapped, so that they can drop their turn 1 play, as an aggressive deck’s health doesn’t really matter until late game, and often doesn’t much matter then either.

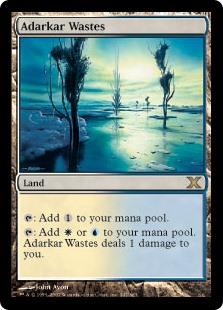
Slower decks certainly don’t like to pay life, but will do so if absolutely necessary. A slow deck needs to get through the early game against an aggressive deck with as much health as possible, to avoid being nuked with finishing spells. Sometimes, paying a life to be able to play your spells results in a net gain of life if you desperately need to pay for that blocker, or counterspell.
A small number of lands that force you to pay life is very manageable because you can use them if you’re desperate, but you’ll often have the luxury to use other lands instead, or choose to have them enter tapped most of the time. Having the option to take some small amount of health for some crunch mana-fixing makes them a much more powerful and versatile option than the tap lands.
Putting it all together
Building a deck is like building a house, and your mana base is your foundation. A strong and well-planned foundation is the difference between a rigid, dependable structure and one which buckles and falls down when things go wrong. It is important to keep in mind the concepts that I have discussed with you in this article, of mana symbols and tempo, of the true cost of side-effects and managing your curve.
When you are putting your deck together, think about what your deck is going to do on turns 1, 2, 3, 4 and so forth. Have a plan in mind for these vital steps of the game and, where possible, have a couple of viable options for each turn (even if your plans for the first three turns are just to build your mana base, have the cards in your deck that enable you to do this and not rely on pure luck).
I hope you have got something out of this, and until next time cube friends: may your mana flow free and your spells land on curve.
Shalom.
